Hello axe throwing aficionados of London! Today we are going to examine what goes into the mythical act of forgery. From Hephaestus’ volcano lair to the legendary booming bellows of Brokkr, we will clear the smoke and let you know exactly what it takes to make a damn good axe.
The first step is to get your hands on some low carbon steel, the cheap stuff, and chisel a hole in it. This is to begin creating the eye of the axe, which is basically the hole that joins the axe head to the haft (handle).
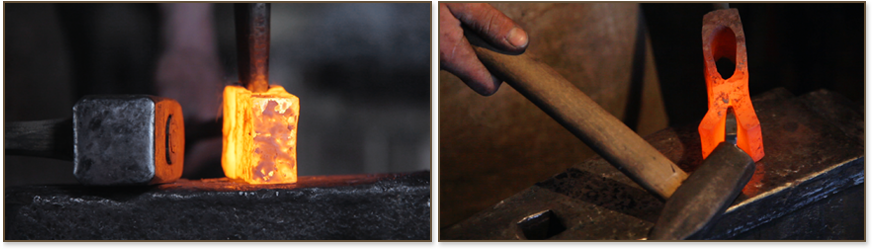
After this, a wedged shaped piece of alloyed steel (the good stuff) is inserted to form the sharp, cutting edge, necessary for burying your axe securely into the bullseye. Now the axe head is heated until it glows a deep, dark yellow, and borax is sprinkled over it. Blacksmiths use borax as a purifying agent or flux. This removes any contaminants in the metal before components are welded, allowing for a high quality join.
Now the axe is heated again, this time to a bright, fiery yellow and the two pieces are welded together. The smith then begins to forge the axe into the desired shape before grinding the rough edge of the blade. The final form is beginning to take shape and we are ready for the good stuff.
Now we begin two similar procedures that both improve the quality of our steel, drastically increasing its strength. The first step is annealing, an essential part of our process that removes any stresses from the steel that have been incurred during the forging. The axe head is heated to 850°C and then slowly cooled in the controlled atmosphere of the furnace. Next is Normalising, where the steel is heated to 800°C and then cooled more quickly at room temperature. The heating and cooling of these two processes changes the microstructure of the steel, altering the size of the grain and ensuring that the axe head is uniform throughout.
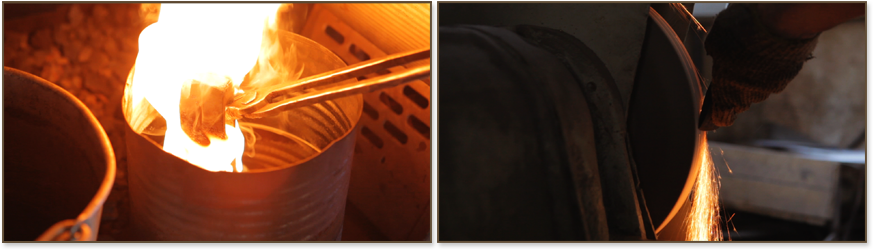
The steel is now heated to 800°C, before being quenched in a bucket of oil and water. This is the badass bit you see in the movies that results in a hiss of steam and atmos!
This has made the axe head very hard but also brittle, so it is heated one final time to just over 200°C and maintained at this temperature for an hour. This final stage of the forging process is called tempering and is the last act in the furnace before rust protection agents are added, such as beeswax and linseed oil.

The blacksmith now carefully grinds and polishes the axe head, making it razor sharp and shiny until it is ready to be thrown at targets to your heart’s content. The haft is now hewn to perfectly fit the axe eye, first roughly cut down and then sanded to precision. Once this is done, the haft is punched into the axe head, a wedge is fitted to make it tight, and it’s all glued in place with epoxy. The axe is then soaked in oil to fill the wooden handle’s pores and ensure that no moisture can mess up the fit.
And there you have it, a freshly forged throwing axe fit for Gimli himself!
For more axe throwing news click here
Follow us on instagram to stay updated!
MORE…
Watch the following video of our brors in Canada forging axes for beginners!
No responses yet